How to Create the Perfect Photo Gallery Wall
It has been said that home is where the heart is, so turning your home into your own by personalizing it is a must. One of the easiest ways to personalize a home is by decorating it with artwork and photographs. Not only does it make a home more beautiful it also adds that much needed personal touch.
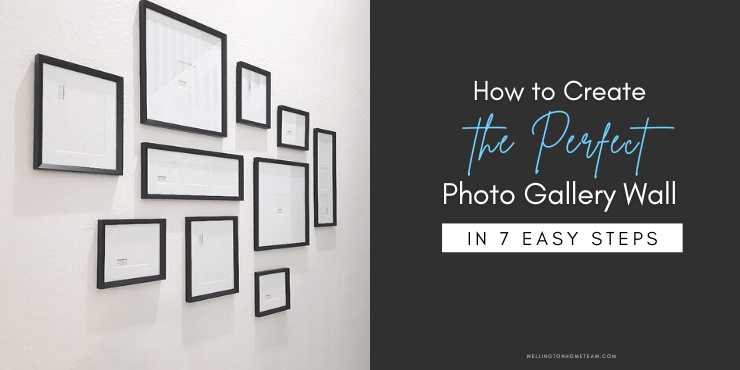
As with any project, it is important to plan & conceptualize your ideas before getting to work. Let’s take a closer look at how to create the perfect photo gallery wall.
7 Steps for Creating a Photo Gallery Wall
1. Pick a Wall
The first step to creating a photo gallery wall is one of the easiest parts, you just need to pick a wall. This potential wall should be open, large enough, and in a well-lit area. Remember a gallery wall with art or photographs will most likely be the main focal point in your home, so make sure to choose wisely.
2. Determine the Style
The next step is to determine the overall style for your photo gallery. Are you drawn to any specific styles like boho chic, rustic, industrial, coastal, or farmhouse? Do you like things that are sleek and modern or more eclectic? Are you a person who prefers symmetry or asymmetry?
There are so many different styles to choose from and you will need to determine what your style is before moving forward. If you are uncertain about the style I highly recommend looking at Pinterest for photo gallery wall inspirations.
3. Determining the Number of Frames
How many frames you plan on using will ultimately depend on the size of your wall along with the size of frames you’d like to use. So the next step is to measure the wall from top to bottom and from left to right. Once you figure out how much space you have then you’ll need to determine how much of the wall you want the photo gallery to take up.
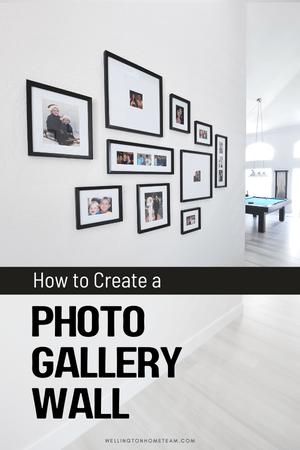 While there are no set rules for how far from the ceiling or floor a frame should be you don’t want them to be too high, too low, or too close to the edge of the wall. Unless you’re doing a massive gallery wall and that’s the look you’re going for.
The rule of thumb for hanging a single piece of art is it should be at eye level, around 57″ from the floor. However, when creating a gallery wall you may have frames well above that measurement and well below depending on the number of frames you select.
If you are going with the same size frames it will be easier to determine the number of frames you need. However, if you plan on using different size frames it may be a little more complicated. You may need to buy more frames than you actually need and figure out what frames work when you decide on the layout.
Just keep in mind you don’t want a cluttered or crowded photo gallery. You’ll want space between each frame, the average distance is usually 2″-4″, but once again there are no set rules.
4. Selecting the Frames
For some people selecting picture frames is the fun part while other people find it overwhelming, but it doesn’t have to be. Just take one step at a time.
First, decide on the material of the frame, do you want to use wood frames, metal frames, glass frames, or another type of material? Next, decide on the color, will all of the frames be the same color or different?
After deciding on the color you’ll need to decide on the size. Will the frames be the same size or different? Then you need to decide on the shape of the frames, do you want square, rectangular, oval, and/or circular frames? Are the style and thickness of each frame going to match or be mixed?
Sometimes it might be easier to purchase a photo gallery wall frame set, which is exactly what I did. For me personally, it saved me a lot of time, money, and frustration.
Lastly, do you plan on using photo mats, if so what color will they be? Are you going to use a single photo mat or a double mat? What size frames and photographs will the mat accommodate?
5. Determining the Layout
There are several different ways to determine the layout of your gallery wall.
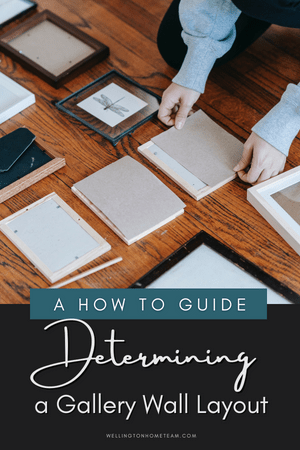 Option 1, just start hanging frames on the wall. Start with one frame in the center and build around it. If you decide to go this route I highly recommend using command hooks instead of nails in case you need to adjust any of the frames. Once the layout is set then you can switch the hooks out for nails.
Option 2, create a template for each frame, tape them on the wall and move them around until you find the perfect layout.
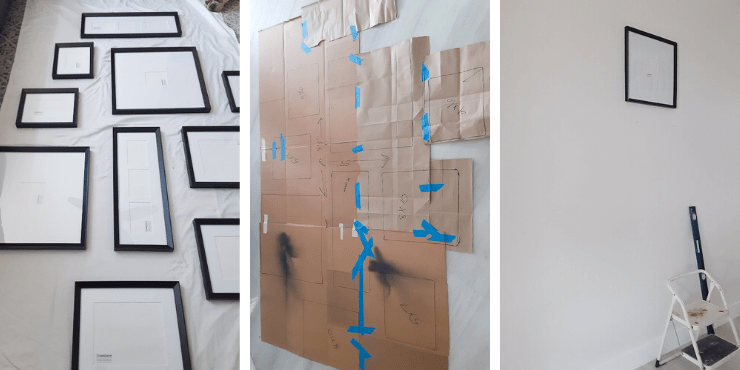
Option 3, tape together newspapers equal to the size of your gallery space, not the wall itself. Then set the newspaper on the floor, put the frames on the newspaper, and move them around until you find the best layout. Once the layout is determined trace the frames onto the newspaper, take the template to the gallery wall, and move it around until you’re happy with the placement. Once you like the placement, tape the template to the wall.
Option 4, consider using a photo gallery wall app. There are several different apps available online for free.
6. Select Your Photographs
Now, this is can be the most difficult part of the entire process. Not only do you have to narrow down thousands of photos to a select few you also need to decide if you’re going to use color or black and white photos. Not all photos will look great in black and white, so this is something to take into consideration when selecting photographs. To be sure, you can always check that beforehand with the help of a black-and-white picture converter.
Many people like to select the photographs first and then determine the layout of their gallery wall. However, if you plan on using different size frames that are different shapes (horizontal or vertical) it’ll be easier to determine the layout first and then select the photos.
Pro Tip: Even if your starting photos don’t share a similar color theme this can be easily fixed with free photo editing tools and filters like those available through Mixbook.
7. Hang the Picture Frames
Now that you’ve created the layout for your large photo gallery wall it’s time to hang it up! Make sure to gather the right tools. You’ll need a hammer, the correct nails, a pencil, a ladder, along with a level. It’s always wise to measure twice and nail once even if you’re using a template, being off by a 1/4 of an inch can throw your entire photo gallery off.
My Photo Gallery Wall Before & After
By following the 7 steps above I was able to transform my old photo gallery wall into something even better! I am so excited to share the before and after photos of my gallery wall makeover.
BEFORE
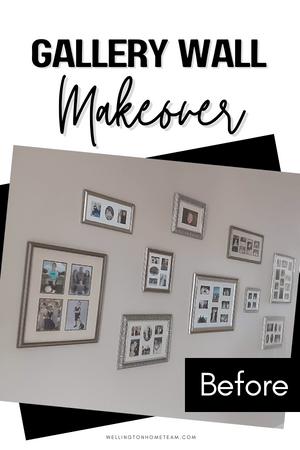 When I created my first gallery wall I just randomly hung frames with no rhyme or reason. In fact, I didn’t even start in the center of the wall. I went from left to right and started running out of room by the time I got to the right side of the wall, and got pretty close to the edge of the wall.
I only had 10 frames and 9 out of 10 had collages, but it was still difficult for me to narrow down what photographs I wanted to use.
I obviously wanted photos of my kids, my parents, and my husband’s parents, can’t forget about the grandparents, great grandparents, siblings, cousins, nieces, nephews, aunts, uncles, and friends. The list goes on and on and before I knew it I used up all 55 photo slots. You read that correctly I had FIFTY-FIVE spaces for photographs and still had trouble narrowing down my pictures.
AFTER
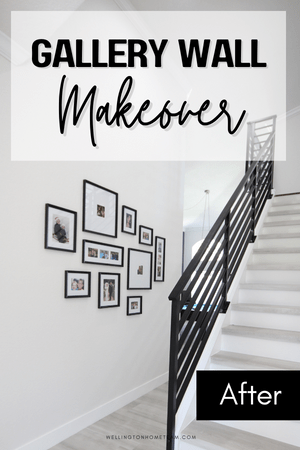 Thankfully, I had a lot of guidance and help from a professional with my current gallery wall.
His main advice was less is more. He limited me to 10 frames, but this time they only held 14 photos. I felt like I was being asked to do the impossible.
How was I going to narrow down the 55 photographs I had and select some new ones? He recommended using pictures that had more than one person in them, which is exactly what I did.
While it was still difficult to narrow down my selection finding photos with groups of people did help.
With that being said I am so happy with how clean and simple my new gallery wall is and I’m even happier I didn’t put 55 photographs back.
How To Recreate My Photo Gallery Wall
If you’d like to recreate my photo gallery wall or use the same photo gallery wall frames, which I love you can purchase them at Crate and Barrel. Not only can you purchase the same exact frames, but you can also customize your own gallery or buy the same set of 10 frames that I purchased.
Please consider spreading the word and sharing; How to Create the Perfect Photo Gallery Wall in 7 Easy Steps
One of the easiest ways to personalize a home is adding a photo gallery wall with photos, artwork or a mix of both. Here's a helpful how to guide! #howto #photogallerywallrAbout the Author
Top Wellington Realtor, Michelle Gibson, wrote: “How to Create the Perfect Photo Gallery Wall in 7 Easy Steps”
Michelle has been specializing in residential real estate since 2001 throughout Wellington Florida and the surrounding area. Whether you’re looking to buy, sell or rent she will guide you through the entire real estate transaction. If you’re ready to put Michelle’s knowledge and expertise to work for you call or e-mail her today.
Areas of service include Wellington, Lake Worth, Royal Palm Beach, Boynton Beach, West Palm Beach, Loxahatchee, Greenacres, and more.

 Michelle Gibson of the Hansen Real Estate Group Inc is a full-time REALTOR who has been specializing in Wellington, Florida real estate since 2001. This veteran of the real estate industry has expertise in technology, marketing, and social media.